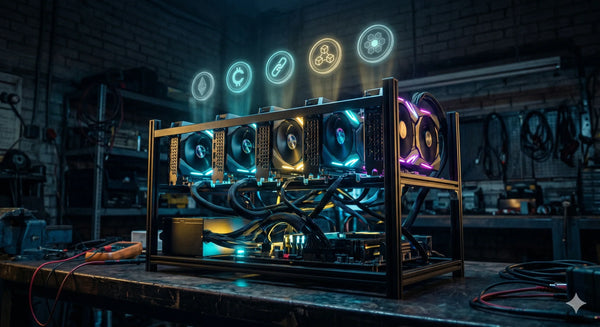
Building a GPU mining rig from scratch is one of the most hands-on ways to get into crypto mining — and in Australia, it's more accessible than you might think. You don't need an engineering degree or a server room. What you need is the right parts, a basic understanding of how they fit together, and realistic expectations about running costs at Australian electricity rates.
This guide walks you through every component required to build a 6-GPU mining rig, with an Australian-focused parts list that's compatible with our 240V/50Hz power grid. If you've been reading about ASIC vs GPU mining and decided that GPU flexibility is the way to go, this is your starting point.
Why Build a 6-GPU Rig?
Six GPUs is the sweet spot for a home mining rig. It's enough cards to generate meaningful hashrate across algorithms like Ethash (Ethereum Classic), Autolykos (Ergo), or KawPow (Ravencoin), while staying within the electrical limits of a standard Australian household circuit. A single 240V/15A outlet can handle roughly 3,600W — and a well-configured 6-GPU rig typically draws between 1,000W and 1,800W depending on the cards and overclock settings, leaving comfortable headroom.
It's also the maximum that most mining motherboards support without jumping to specialised 12-GPU boards, which add complexity and cost. Start with six, learn the process, and scale from there if the numbers work.
Complete Parts List
Here's everything you need. We'll cover each component in detail below, but this is your shopping checklist:
| Component | Qty | Notes |
|---|---|---|
| Open-frame mining chassis | 1 | Steel frame with GPU mounting rails |
| Mining motherboard | 1 | 6+ PCIe slots (x1 or USB-to-PCIe) |
| CPU | 1 | Basic LGA1151 Celeron or Pentium |
| RAM | 1 | Single 8 GB DDR4 stick |
| Storage | 1 | 120 GB SSD or 16 GB USB drive |
| Power supply (PSU) | 1 | Full modular, 1600W–2000W rated |
| PCIe risers | 6 | Powered risers (009S Plus or equivalent) |
| GPUs | 6 | Matched or mixed — your choice |
| Ethernet cable | 1 | Cat5e or Cat6, length to suit |
| Power button/switch | 1 | Momentary switch if not included with frame |
Let's break each one down.
1. The Frame: Open-Frame Mining Chassis
Forget a standard PC case — GPU mining rigs use open-frame chassis that mount the graphics cards vertically with maximum airflow between them. This is non-negotiable for thermal management when you're running six cards at load 24/7.
The ATX open-frame mining rig chassis is purpose-built for this. It's cold-rolled steel, fits standard ATX motherboards and PSUs, and has mounting rails for up to 8 GPUs with proper spacing. It's sturdy, stackable if you build multiple rigs later, and far cheaper than trying to hack together a DIY frame from aluminium angle.
Place the frame somewhere with good ambient airflow — a garage, shed, or spare room works well. Our guide on mining in sheds and garages covers zoning and practical considerations for Australian setups.
2. The Motherboard
Mining motherboards are designed for one thing: running as many GPUs as possible from a single board. You don't need fancy VRM phases or overclocking support — you need PCIe slot count and stability.
Two solid options from the MinerHub catalogue:
- ASRock H510 PRO BTC+ — LGA1200, Intel H510 chipset, 6 PCIe slots, DDR4 support. This is a plug-and-play choice for a 6-GPU rig. Supports 10th and 11th Gen Intel CPUs, which are cheap and readily available in Australia.
- B250C BTC 12-GPU motherboard — LGA1151, 12 USB 3.0-to-PCIe ports for direct riser connection. Overkill for six cards, but gives you expansion room and the USB ports simplify cable routing. Pairs with cheap 6th/7th Gen Intel CPUs.
For a dedicated 12-GPU build down the track, the BIOSTAR TB360-BTC PRO 2.0 is another option with 12 native PCIe 3.0 slots and LGA1151 support.
The CPU and RAM are minimal — a Celeron G-series processor and a single 8 GB DDR4 DIMM is all you need. Mining operating systems like HiveOS barely touch the CPU or RAM. Buy the cheapest compatible parts you can find locally.
3. The Power Supply
The PSU is arguably the most critical component in a mining rig. An undersized or low-quality power supply will cause instability, random shutdowns, or worse — a fire risk. Don't cheap out here.
For a 6-GPU rig, you want a fully modular PSU rated between 1,600W and 2,000W. Fully modular means you only connect the cables you need, which dramatically reduces cable clutter in an open frame and improves airflow.
The 2000W full modular ATX mining PSU is designed specifically for multi-GPU rigs, with enough PCIe power connectors for six cards and 110V–220V input range (so it works natively on Australian 240V). It's rated for 6-GPU operation and provides the headroom you need.
For smaller builds or lower-power GPU selections (like six RX 6600 XTs drawing ~100W each), the 1200W PCIe 5.0 ATX 3.0 PSU or even the 1000W full modular PSU could be sufficient — but always leave at least 20% headroom above your calculated total draw.
A rule of thumb: add up the TDP of all six GPUs, add 100–150W for the motherboard/CPU/fans, and multiply by 1.2. That's your minimum PSU wattage.
4. PCIe Risers
Risers are the bridge between your motherboard's PCIe slots and the GPUs mounted on the frame's rails above. Each GPU connects via a riser cable that carries the PCIe data signal and provides supplementary power.
The PCI-E Riser 009S Plus is the industry standard. It converts a PCIe x1 slot to x16 via a 60cm USB 3.0 cable, with four solid capacitors for stability and Molex/6-pin/SATA power input options. You'll need six of these — one per GPU.
If your motherboard has full x16 PCIe slots and you want a direct connection without the USB cable (for a cleaner build or slightly lower latency), the PCIe 4.0 x16 riser extension cable is an alternative, though it's typically used for single-GPU vertical mounts rather than multi-GPU rigs.
Important safety note: never power risers via SATA adapters from your PSU's SATA cables. SATA connectors are rated for far less current than a GPU riser draws, and melted SATA connectors are one of the most common causes of mining rig fires. Use the Molex or 6-pin PCIe power input on the riser instead.
5. The GPUs
This is the fun part — and the biggest investment. Your GPU choice depends on what algorithm you want to mine, your budget, and your electricity costs. Here are options from the MinerHub catalogue, grouped by use case:
Budget Entry (Under $250 AUD per card)
- SOYO Radeon RX 580 8GB — the workhorse of the mining era. Cheap, well-understood overclocking profiles, 8 GB VRAM for ETCHash. Draws around 130W undervolted. Best for beginners who want low upfront cost.
- MLLSE RX 5500 XT 8GB — newer architecture than the 580, lower power draw (~75W undervolted), 8 GB GDDR6. Solid efficiency per watt.
- ASRock RX 6500 XT 4GB — ultra-low power (~55W), but only 4 GB VRAM limits algorithm options. Good for KawPow and lighter workloads.
Mid-Range Performance
- AMD RX 6600 XT 8GB — excellent efficiency on ETCHash at around 100W undervolted. 8 GB GDDR6 and RDNA 2 architecture. One of the best value-per-hashrate cards available.
- MLLSE RX 5700 XT 8GB — stronger raw hashrate than the 6600 XT on most algorithms, but higher power draw (~130W). Good if you're optimising for hashrate over efficiency.
- Sapphire NITRO+ RX 6700 XT 12GB — premium build quality with Sapphire's cooling solution, 12 GB VRAM future-proofs for larger DAG sizes. Draws around 120W undervolted.
High-End / Dual-Use (Mining + Gaming/AI)
- Yeston RX 6800 XT 16GB — top-tier RDNA 2 hashrate with 16 GB VRAM. Higher power draw (~150W tuned) but strongest ETCHash performance in the AMD range.
- ASUS TUF RTX 3080 10GB — Nvidia's Ampere architecture, excellent for algorithms that favour CUDA cores. Also a serious gaming card when you're not mining.
- SZSJKJ RTX 2080 Ti 22GB — the 22 GB VRAM variant makes this a dual-purpose mining and AI/ML card. Turing architecture with 4,352 CUDA cores.
For a dedicated mining rig where efficiency matters most, six RX 6600 XTs is hard to beat at Australian electricity rates. For a deeper comparison of GPU mining economics, see our guide on what you need for a GPU mining rig.
6. Storage and Operating System
You have two main options for your mining OS:
- HiveOS — the most popular dedicated mining OS. It's Linux-based, boots from a USB drive or small SSD, and gives you a web dashboard to manage overclocks, pool settings, and monitoring from any device. Free for single-rig users. Flash it to a 16 GB USB drive and you're done.
- Windows 10/11 — familiar interface, required if you want to use MSI Afterburner for overclocking or run specific mining software. Needs a 120 GB SSD minimum. More overhead than HiveOS but easier if you're not comfortable with Linux.
For most dedicated mining rigs, HiveOS is the better choice. It's lighter, more stable for 24/7 operation, and the remote management dashboard means you can monitor and adjust your rig without being physically present. Our remote monitoring guide covers the tools and apps that work with both ASIC and GPU miners.
Assembly: Putting It All Together
With all your parts on the bench, here's the build order:
Step 1: Prepare the Motherboard
Install the CPU, RAM, and SSD (or plug in your HiveOS USB) onto the motherboard before mounting it in the frame. It's much easier to work with the board on a flat surface. Apply thermal paste and attach the stock CPU cooler — nothing fancy needed.
Step 2: Mount the Motherboard and PSU
Secure the motherboard to the frame's mounting standoffs and install the PSU in its bay. Route the 24-pin ATX power cable and 8-pin CPU power cable to the motherboard. Don't connect the GPUs yet.
Step 3: Test Boot Without GPUs
Connect a monitor, keyboard, and Ethernet cable. Power on and verify the system posts to BIOS. This confirms your motherboard, CPU, RAM, and PSU are working before you add complexity. While in BIOS, set the primary display output to PCIe (not onboard), enable "Above 4G Decoding" if available, and set PCIe link speed to Gen 1 or Gen 2 (reduces riser compatibility issues).
Step 4: Install the OS
Boot into your chosen OS and confirm it runs. If you're using HiveOS, create your rig in the web dashboard and note your rig ID. If Windows, install GPU drivers and your mining software (such as T-Rex, lolMiner, or TeamRedMiner depending on your cards).
Step 5: Install Risers and GPUs
Plug each 009S Plus riser's USB cable into a PCIe x1 slot on the motherboard. Mount each GPU on the frame's rails and connect the riser's x16 adapter to the GPU's PCIe slot. Connect PCIe power cables from the PSU to each GPU (6-pin or 8-pin depending on the card). Connect Molex or 6-pin power to each riser board.
Add one GPU at a time, booting and confirming detection between each addition. This makes troubleshooting far easier than installing all six and trying to figure out which one isn't being recognised.
Step 6: Configure Overclocks and Pool Settings
Once all six GPUs are detected, configure your mining software or HiveOS flight sheet with your pool details and wallet address. Apply conservative overclocks to start — reduce core clock, boost memory clock, and set a power limit. The exact values depend on your GPU model and target algorithm. Plenty of community-shared profiles exist for every card.
If you're new to overclocking, our overclocking safety guide covers the principles — while written for ASICs, the core concepts of thermal limits and incremental tuning apply equally to GPUs.
Electricity Cost Estimates
A 6-GPU rig's total power draw varies significantly based on card selection and overclock settings. Here are three common configurations and their running costs at typical Australian rates, based on our state-by-state electricity breakdown:
| Configuration | Est. Wall Draw | Daily Cost @ $0.30/kWh | Monthly Cost |
|---|---|---|---|
| 6× RX 6600 XT (undervolted) | ~700W | $5.04 | $153 |
| 6× RX 5700 XT (undervolted) | ~900W | $6.48 | $197 |
| 6× RX 6800 XT (undervolted) | ~1,050W | $7.56 | $230 |
These figures include PSU efficiency losses (assume ~90% for a quality unit). Your actual costs will depend on your specific tariff — check our electricity and mining deep dive for current state-by-state rates and tips for reducing costs, and consider whether solar power could offset daytime consumption.
Network and Connectivity
Always use a wired Ethernet connection for your mining rig. Wi-Fi adds latency and the occasional dropout that results in rejected shares and lost income. Our Wi-Fi vs Ethernet guide explains why this matters, and if your rig is in a shed or garage away from the router, our home network guide for miners covers options like powerline adapters, managed switches, and cable routing.
Monitoring and Ongoing Maintenance
Once your rig is running, the work shifts to monitoring and optimisation. Key metrics to watch include per-GPU hashrate, temperature, fan speed, rejected share percentage, and total power draw. Our guide on reading your miner's stats explains what each metric means and when to worry.
Thermal management is especially important in Australia. Six GPUs in an open frame generate significant heat — in an un-airconditioned garage during a Perth or Brisbane summer, ambient temps above 35°C will throttle your cards and reduce hashrate. Our thermal management guide covers exhaust ducting, inline fans, and other practical cooling strategies that apply to GPU rigs as much as ASICs.
Dust is the other enemy. Open frames are great for airflow but terrible for dust accumulation. Blow out your GPUs and risers with compressed air every 4–6 weeks, and check fan bearings for noise or wobble every few months.
Tax and Depreciation
Every component in your mining rig is a depreciable asset under ATO rules. The frame, PSU, motherboard, GPUs, risers — all of it can be claimed. If you're mining as a business (which a 6-GPU rig likely qualifies as), you can also deduct electricity and a portion of your internet costs. Our ATO hardware depreciation guide walks through the effective life calculations, and the full ATO crypto mining tax guide covers income reporting, CGT events, and record-keeping requirements.
If you're unsure whether your mining activity counts as a hobby or a business for tax purposes, our guide on whether you need an ABN will help you figure that out.
What to Mine With a 6-GPU Rig in 2026
GPU mining is all about flexibility — unlike an ASIC locked to one algorithm, your rig can switch between coins as profitability shifts. The most commonly mined GPU coins in 2026 include Ethereum Classic (ETCHash), Ergo (Autolykos2), Ravencoin (KawPow), Flux (ZelHash), and Neoxa (KawPow). Use WhatToMine to compare daily revenue across algorithms for your specific card, and factor in your electricity cost before switching.
For a broader look at which side of the ASIC vs GPU divide makes more sense for your situation, our altcoin vs Bitcoin mining comparison lays out the economics, and the best altcoin ASICs guide covers the ASIC alternatives if you decide dedicated hardware is a better fit.
Final Checklist Before You Power On
- All PCIe power cables are connected directly from PSU to GPU — no SATA-to-PCIe adapters
- Each riser is powered via Molex or 6-pin, not SATA
- Above 4G Decoding is enabled in BIOS
- PCIe link speed is set to Gen 1 or Gen 2
- Ethernet cable is connected — not relying on Wi-Fi
- Mining OS is configured with pool and wallet details
- Conservative overclock settings applied (optimise later once stable)
- Rig is placed in a ventilated area away from flammable materials
- Smoke detector installed nearby — this is non-negotiable
Ready to build? Browse the full range of mining GPUs, rig accessories, and GPU mining hardware in the MinerHub store. If you need help choosing the right parts for your budget and electricity rate, get in touch — we're always happy to help Australian miners get started.