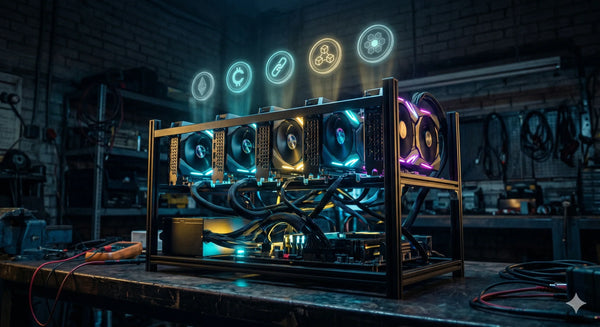
If you've just set up your first ASIC miner — or you're about to — one of the first decisions you'll face is whether to mine solo or join a pool. For most Australian beginners, a mining pool is the right starting point: instead of competing alone against the entire Bitcoin network, you contribute your hashrate to a group and share proportional rewards each time the pool finds a block.
This guide walks through the complete process step by step: choosing a pool, creating an account, configuring your miner, and understanding when and how you get paid.
If you're still deciding between pool and solo mining, read this first: Mining Pool vs Solo Mining: Which Is Best for Beginners?
What You'll Need Before You Start
Before touching any pool settings, make sure you have the following ready:
- A running ASIC miner — powered on, connected to your local network, and accessible via its web interface (usually by entering the miner's IP address into a browser)
- A Bitcoin wallet address — this is where your pool payouts will be sent. A non-custodial wallet like Exodus, Electrum, or a hardware wallet like Ledger is recommended. Do not use an exchange deposit address unless you've confirmed the exchange supports mining payouts
- A stable internet connection — wired ethernet is preferable for miners, but Wi-Fi works for lower-hashrate home units
- The miner's IP address — check your router's connected devices list or use a network scanner app to find it
Once you have those ready, you can complete the full pool setup in under 15 minutes.
Step 1 — Choose a Mining Pool
There are dozens of Bitcoin mining pools operating globally. For Australian miners, the key criteria to filter on are: fee structure, payout method, minimum payout threshold, server locations, and pool size.
Fee structure
Most pools charge between 1% and 2% of your earnings as a fee. Some pools are "fee-free" but compensate through less favourable payout schemes. Always check the fee before committing.
Payout method
The two most common payout methods are:
- PPS (Pay Per Share) — you are paid a fixed rate for every valid share your miner submits, regardless of whether the pool finds a block. More predictable income, usually a slightly higher fee.
- PPLNS (Pay Per Last N Shares) — your earnings are tied to actual blocks found. Income fluctuates but can be higher over time if the pool is performing well. Lower fees are common.
- FPPS (Full Pay Per Share) — a variation of PPS that also includes a share of transaction fees on top of the block subsidy. Currently the most popular model among major pools.
Server locations
Choose a pool with servers in Asia-Pacific or Australia where possible. Lower latency between your miner and the pool server reduces stale share rates, which means more of your submitted work counts toward earnings. Most major pools have Singapore or Hong Kong endpoints — these are generally the closest viable options for Australian miners.
Recommended pools for Australian beginners
The following are established, reputable pools with good Asia-Pacific infrastructure:
- Antpool (antpool.com) — operated by Bitmain, one of the largest pools globally. FPPS payout, 2.5% fee, Singapore server available. Straightforward interface, good for beginners.
- F2Pool (f2pool.com) — one of the longest-running pools. PPS+ model, 2.5% fee, solid Asia-Pacific infrastructure.
- ViaBTC (viabtc.com) — multiple payout options (PPS, PPLNS, SOLO), 2–4% fee, Singapore servers. Good choice if you want flexibility.
- Braiins Pool (braiins.com/pool) — formerly Slush Pool, the world's first Bitcoin mining pool. FPPS, 2% fee. Slightly more technical but well-regarded for transparency.
- OCEAN (ocean.xyz) — a newer, non-custodial pool paying directly to your wallet via Stratum V2. Zero pool fee (earns from coinbase transactions). Good for privacy-conscious miners.
For this guide, we'll use Antpool as the example — but the process is nearly identical across all major pools.
Step 2 — Create a Pool Account and Add a Worker
- Go to antpool.com and click Sign Up. Enter your email, create a password, and verify your email address.
- Once logged in, navigate to Pool Management → Worker. Click Add Worker.
- Give your worker a name — something simple like
miner01ors21pro_01. The worker name is how the pool identifies your individual machine if you have multiple miners on the same account. - Note your full worker ID — it will be in the format
YourAccountName.WorkerName(e.g.stefminer.miner01). You'll need this when configuring the miner. - Navigate to Earnings → Payout Settings and enter your Bitcoin wallet address. Set your payout threshold — most pools default to 0.001 BTC, which you can adjust based on your preference.
Step 3 — Note Your Pool's Stratum Server Addresses
Your miner connects to the pool using a protocol called Stratum. You'll need to enter one or more server addresses (called stratum URLs) into your miner's configuration. Pools provide primary and backup servers — always configure at least two.
For Antpool's SHA-256 (Bitcoin) servers, the stratum addresses are typically formatted as:
Primary:   stratum+tcp://ss.antpool.com:3333
Secondary: stratum+tcp://ss.antpool.com:443
Tertiary:  stratum+tcp://ss.antpool.com:25
These addresses are listed in your pool account under Pool → Mining Guide or similar. Always copy them directly from your pool's official documentation rather than from third-party sources.
Step 4 — Log Into Your Miner's Web Interface
Every ASIC miner has a built-in web interface accessible from any browser on your local network. To access it:
- Find your miner's IP address — check your router's device list or use a free tool like Advanced IP Scanner (Windows) or Angry IP Scanner (Mac/Linux).
- Type the IP address into your browser's address bar (e.g.
http://192.168.1.45). - Log in with the default credentials. Common defaults:
- Bitmain Antminer:
root / root - MicroBT WhatsMiner:
admin / admin - Canaan Avalon (non-app models): check the user manual — some use a QR code setup
- Bitmain Antminer:
- Change the default password immediately after logging in — this is a basic security step that most beginners skip.
Step 5 — Enter Your Pool Configuration
Once inside the web interface, locate the pool or miner configuration section. The exact label varies by manufacturer:
- Bitmain Antminer: Miner Configuration → General Settings
- MicroBT WhatsMiner: Configuration → Pool Settings
- Canaan Avalon: Mining Pool settings
You'll see fields for Pool 1, Pool 2, and Pool 3. Fill them in as follows:
| Field | Pool 1 (Primary) | Pool 2 (Backup) |
|---|---|---|
| Pool URL | stratum+tcp://ss.antpool.com:3333 | stratum+tcp://ss.antpool.com:443 |
| Worker | YourAccountName.miner01 | YourAccountName.miner01 |
| Password | 123 (or leave blank) | 123 (or leave blank) |
Click Save or Apply. The miner will restart its network connection and attempt to connect to the pool — this usually takes 30–60 seconds.
Step 6 — Verify the Connection
After saving, check two places to confirm everything is working:
In your miner's web interface: Navigate to the miner status or dashboard page. You should see the pool status show as "Connected" or "Active", and within a few minutes you should see an accepted share count starting to increment.
In your pool account: Log into your pool dashboard and navigate to the Workers section. Your worker should appear as online within 5–10 minutes, with hashrate beginning to display. If it shows 0 TH/s after 15 minutes, double-check your stratum URLs and worker name for typos.
A healthy miner dashboard will show accepted shares climbing and a rejected share rate below 1%. Rejected shares above 1–2% can indicate network latency issues, an incorrect pool URL, or hardware problems.
Step 7 — Understand Your Payout Schedule
Your first payout won't arrive immediately — it accumulates as your miner contributes shares to the pool over time. The timeline depends on your hashrate and the pool's minimum payout threshold.
As a rough guide at current network conditions: a miner contributing 100 TH/s to a pool earning FPPS payouts will accumulate approximately 0.0002–0.0004 BTC per day depending on Bitcoin price, network difficulty, and pool fee. At a 0.001 BTC minimum threshold, that's roughly 3–5 days to first payout at 100 TH/s.
Lower-hashrate home miners — including entry-level machines like the Canaan Avalon Nano 3S — will take longer to reach payout thresholds. Many pools allow you to lower the minimum payout (sometimes to as low as 0.0001 BTC) if you prefer more frequent, smaller payouts.
Common Mistakes to Avoid
Using an exchange deposit address for payouts
Some exchanges do not support mining pool payouts and will reject or lose transactions that arrive repeatedly from the same source. Always use a personal wallet address — not a Coinspot, Swyftx, or Binance deposit address — unless you've specifically confirmed it works for mining payouts.
Only configuring one pool server
If your primary pool server goes down and you haven't set a backup, your miner will sit idle and earn nothing until you manually intervene. Always fill in at least two pool server addresses.
Ignoring the rejected share rate
A rejected share rate above 1–2% means your miner is doing work that isn't being counted. Common causes: using a server geographically far from Australia, an unstable internet connection, or a misconfigured pool URL. Switch to a closer server first and see if it improves.
Not changing default login credentials
Default passwords on ASIC miners are publicly known. Any device on your local network — or remotely, if your router exposes the miner's port — can access the admin panel. Change the default password on first login.
Confusing hashrate displayed in the pool vs on the miner
Pool-reported hashrate is calculated from submitted shares and will fluctuate. It's normal for it to read 5–15% lower than what your miner's local dashboard shows, especially over short windows. Compare 24-hour averages rather than real-time figures.
Which Miners Are Pool-Ready Out of the Box?
All ASIC miners we stock support standard Stratum pool connections and can be configured using the steps above. A few worth highlighting for beginners:
- Canaan Avalon Q — 90 TH/s: Wi-Fi enabled, app-based setup, designed for home pool mining with minimal configuration
- Bitmain Antminer S21 — 151 TH/s: Industry-standard web interface, direct integration with Antpool, highly documented
- Bitmain Antminer S21 Pro — 234 TH/s: Same interface as the S21, top-tier hashrate for serious pool contributors
- MicroBT WhatsMiner M31S+ and M30S: Clean pool configuration interface, good Asia-Pacific connectivity
- Canaan Avalon A1246 and A1346: Proven commercial-grade pool miners with a long track record
Browse the full range in our Bitcoin Miners collection.
What to Monitor Once You're Running
Once your miner is connected to a pool and earning shares, the main things to keep an eye on:
- Pool hashrate vs local hashrate — should be within 10–15% of each other on 24-hour averages
- Rejected share rate — aim to keep this below 1%
- Miner temperature — check the chip and board temperatures in your miner's dashboard; sustained temperatures above 85°C indicate a cooling issue
- Uptime — unexpected restarts or disconnections can indicate power supply, network, or hardware faults
- Payout history — confirm payouts are arriving at your wallet at the expected interval
For guidance on managing heat in Australian conditions, see: Thermal Management for ASIC Miners: Cooling in Australian Summer
Ready to Start Mining?
Joining a pool takes less than 15 minutes once your hardware is running. The setup steps above cover the vast majority of miners and pools — if you run into a manufacturer-specific quirk, the pool's official mining guide (usually under a "Get Started" or "Mining Tutorial" tab) will have model-specific screenshots.
For a broader look at how mining pools compare to solo mining — and which approach suits different goals — read: Mining Pool vs Solo Mining: Which Is Best for Beginners?
Browse all Bitcoin miners available for Australian delivery in our Bitcoin Miners collection and our full ASIC Miners collection.
Any questions about setup or choosing the right hardware? Get in touch — we're based in Perth and happy to help.